

How To Import Pictures Windows 7
Not only has Windows 7 changed its photograph viewing and organizing features, it has besides inverse the way you lot import images from a camera. Now when you transfer images from your camera, Windows asks you to have the opportunity to become ahead and add together the tagging data.
Most digital cameras come with software for transferring images to your PC. All the same, in most cases, you're better off using Windows seven's congenital-in software, which is able to easily fetch photos from nearly any make and model of digital camera.
-
Plug the camera'southward cablevision into your computer.
Well-nigh cameras come with two cables: One that plugs into your Boob tube set for viewing, and another that plugs into your PC. Plug the small stop into your camera, and the larger end into your computer's USB port.
Transferring the images from your photographic camera with a retentivity menu reader speeds up the process. When you lot slide your card into the reader and hook information technology up to your PC, Windows 7 will run through the aforementioned steps as below and exercise it faster.
-
Turn on your camera (if information technology's not already turned on) and wait for Windows 7 to recognize it.
When Windows vii recognizes your photographic camera, the AutoPlay window appears.
If y'all're plugging in the photographic camera for the first time, Windows vii sometimes heralds the camera'southward presence past listing its model number in a pop-upward window in a higher place your taskbar by the clock.
If Windows 7 doesn't recognize your camera, make sure that the camera is set to display mode — the one that lets you view your photos on the camera'southward viewfinder. If yous yet take problems, unplug the cable from your PC, look a few seconds, so plug it back in.
Don't see the AutoPlay window? Open up Computer from the Start card and double-clicking your camera icon.
-
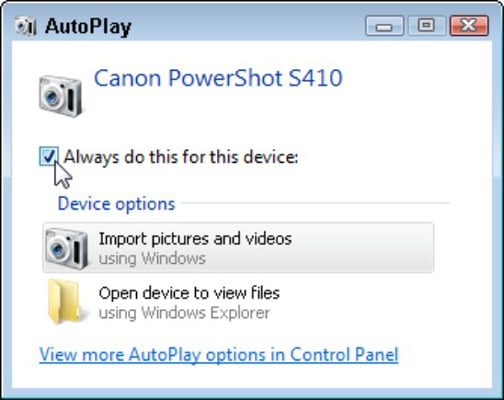
In the AutoPlay window, click the Import Pictures and Videos Using Windows selection.
After you click the Import Pictures and Videos Using Windows option, the Import Pictures and Videos box appears.
If you want, also select the E'er Exercise This for This Device check box. It tells Windows 7 to automatically take hold of your photographic camera's pictures whenever you connect it to your PC.
-
Type a tag or name for your photos and click the Import button.

Tagging works best when all your photos come from one session.
Clicking the Import button brings your camera'southward photos into your PC and automatically renames them.
Type a word or two to describe the photos. For instance, if you blazon the word Cat , Windows 7 names the incoming photos as Cat 001, Cat 002, Cat 003, and and then on. Later on, you can use your Get-go menu's Search box to find all the pictures with a given tag.
Clicking the Import Settings link in the bottom left corner lets you alter how Windows 7 imports your photos.
-
Select the Erase After Importing check box.
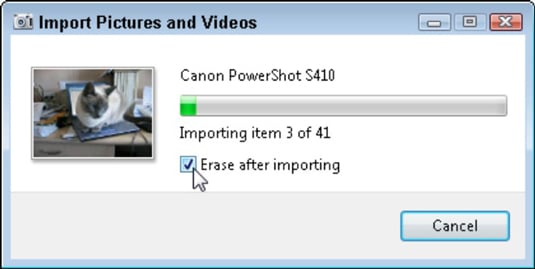
Select the Erase After Importing check box to gratis upward your camera for more photos.
When Windows finishes importing your photos, it displays the folder containing your new pictures.
About This Commodity
This article is from the book:
- Windows seven For Dummies ,
This commodity can be found in the category:
- Windows ten ,
Source: https://www.dummies.com/article/technology/computers/operating-systems/windows/windows-10/how-to-import-images-from-a-camera-using-windows-7-195469
Posted by: koehlertallean.blogspot.com
0 Response to "How To Import Pictures Windows 7"
Post a Comment